How to Draw a Heart
Welcome! If you are wondering how to draw a heart, you are in the perfect place. This tutorial is made just for kids and total beginners. By following our super simple steps, you will learn how to draw a heart easily and have fun making it colorful. Grab your pencil and let us get started!
- Easy
- 10 minutes
- Ages 4+
- Beginner
- Kids
- Simple Lines
About This Simple Guide
We break down how to draw a heart into simple, bite-sized lines and curves. By starting with basic curves, beginners can build confidence and create a beautiful drawing without feeling overwhelmed.

How to Draw a Heart Step by Step
- 1Step 1 of 6
Draw the first bump
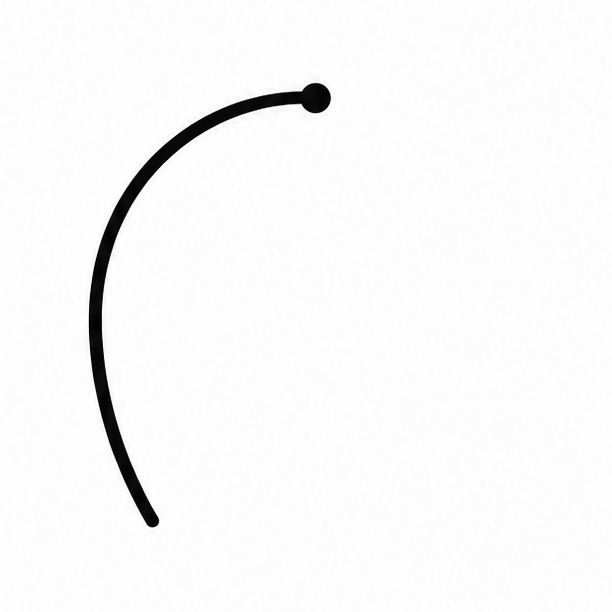
Start by placing a small, light dot near the top middle of your paper to mark the center. From this dot, draw a smooth curve that goes up, bends far to the left, and rounds back downward. This forms the very top bump on the left side.
Tip: Draw gently so you can erase any little mistakes along the way.
- 2Step 2 of 6
Draw the left bottom
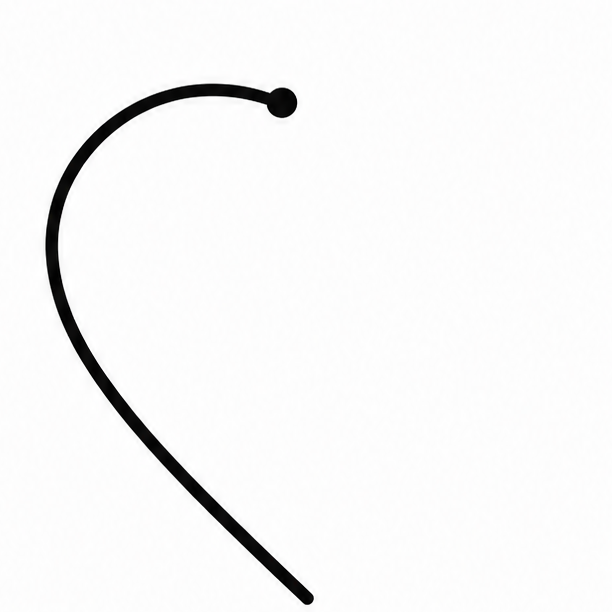
Now, we will finish the left side. Continue your curved line and draw it straight down at an angle, pointing toward the bottom middle of your paper. This angled line will create the sharp bottom point when we finish our drawing later.
Tip: Imagine you are drawing the side of a letter V pointing downward.
- 3Step 3 of 6
Draw the right bump
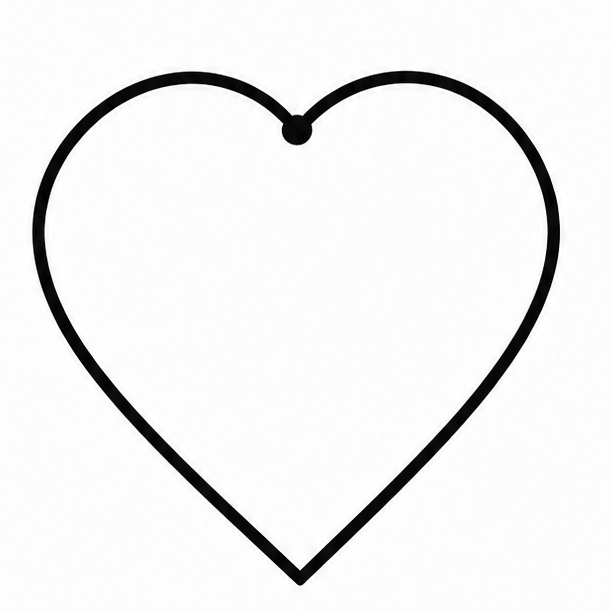
Go back to your starting dot at the top middle. Now, you will draw a matching curve that goes up, bends to the right, and rounds downward. This builds the right top side of your drawing, matching the bump you already drew on the left.
Tip: Try to make this right curve the exact same height as the first one.
- 4Step 4 of 6
Connect the bottom point

Continue the line from the right bump downward at a sharp angle. Bring this line all the way down until it meets the very end of your first line. When they touch at the bottom point, you will have completed the full outline. Learning how to draw a heart is really that simple!
Tip: Keep your eyes on the bottom point as you draw your line downward.
- 5Step 5 of 6
Add a shiny detail

To make your drawing look extra special, let us add a small detail. Draw a tiny, curved line just inside the top left bump. This simple little mark acts as a reflection, making your drawing look slightly shiny and bright. It adds a wonderful finishing touch.
Tip: You can add another tiny dot right next to the curve for extra shine.
- 6Finished drawing
Color your drawing

Now for the most fun part! Grab your crayons, markers, or colored pencils. You can use classic reds and pinks, or pick any color of the rainbow you like best. Coloring carefully inside the lines completes this fun and easy drawing guide.
Tip: Use a darker color around the edges to make your bright center pop!
Draw Heart in 6 Easy Steps
Anyone can learn how to draw a heart — no drawing experience needed.
6
Simple steps
10 minutes
Start to finish
Ages 4+
Great for
Fun Ways to Change Your Drawing
Once you know how to draw a heart, you can try these easy ideas to make it totally unique.
Add A Face
Draw two happy little eyes and a big smiling mouth right in the middle.
Draw It Broken
Draw a jagged zig-zag line down the middle to show two separate pieces.
Make It Fly
Add two little bird wings onto the sides so it looks like it is soaring.
Common Beginner Mistakes
Lopsided bumps
Sometimes one side is much bigger than the other. Fix this by drawing a light line straight down the middle to help you see both sides equally.
Flat top
If the top bumps are too flat, make sure your pencil goes up toward the top of the paper first before rounding down.
Sharp top bend
If the middle looks like a pointy letter V instead of a smooth curve, start your curves a little wider apart at the top dot.
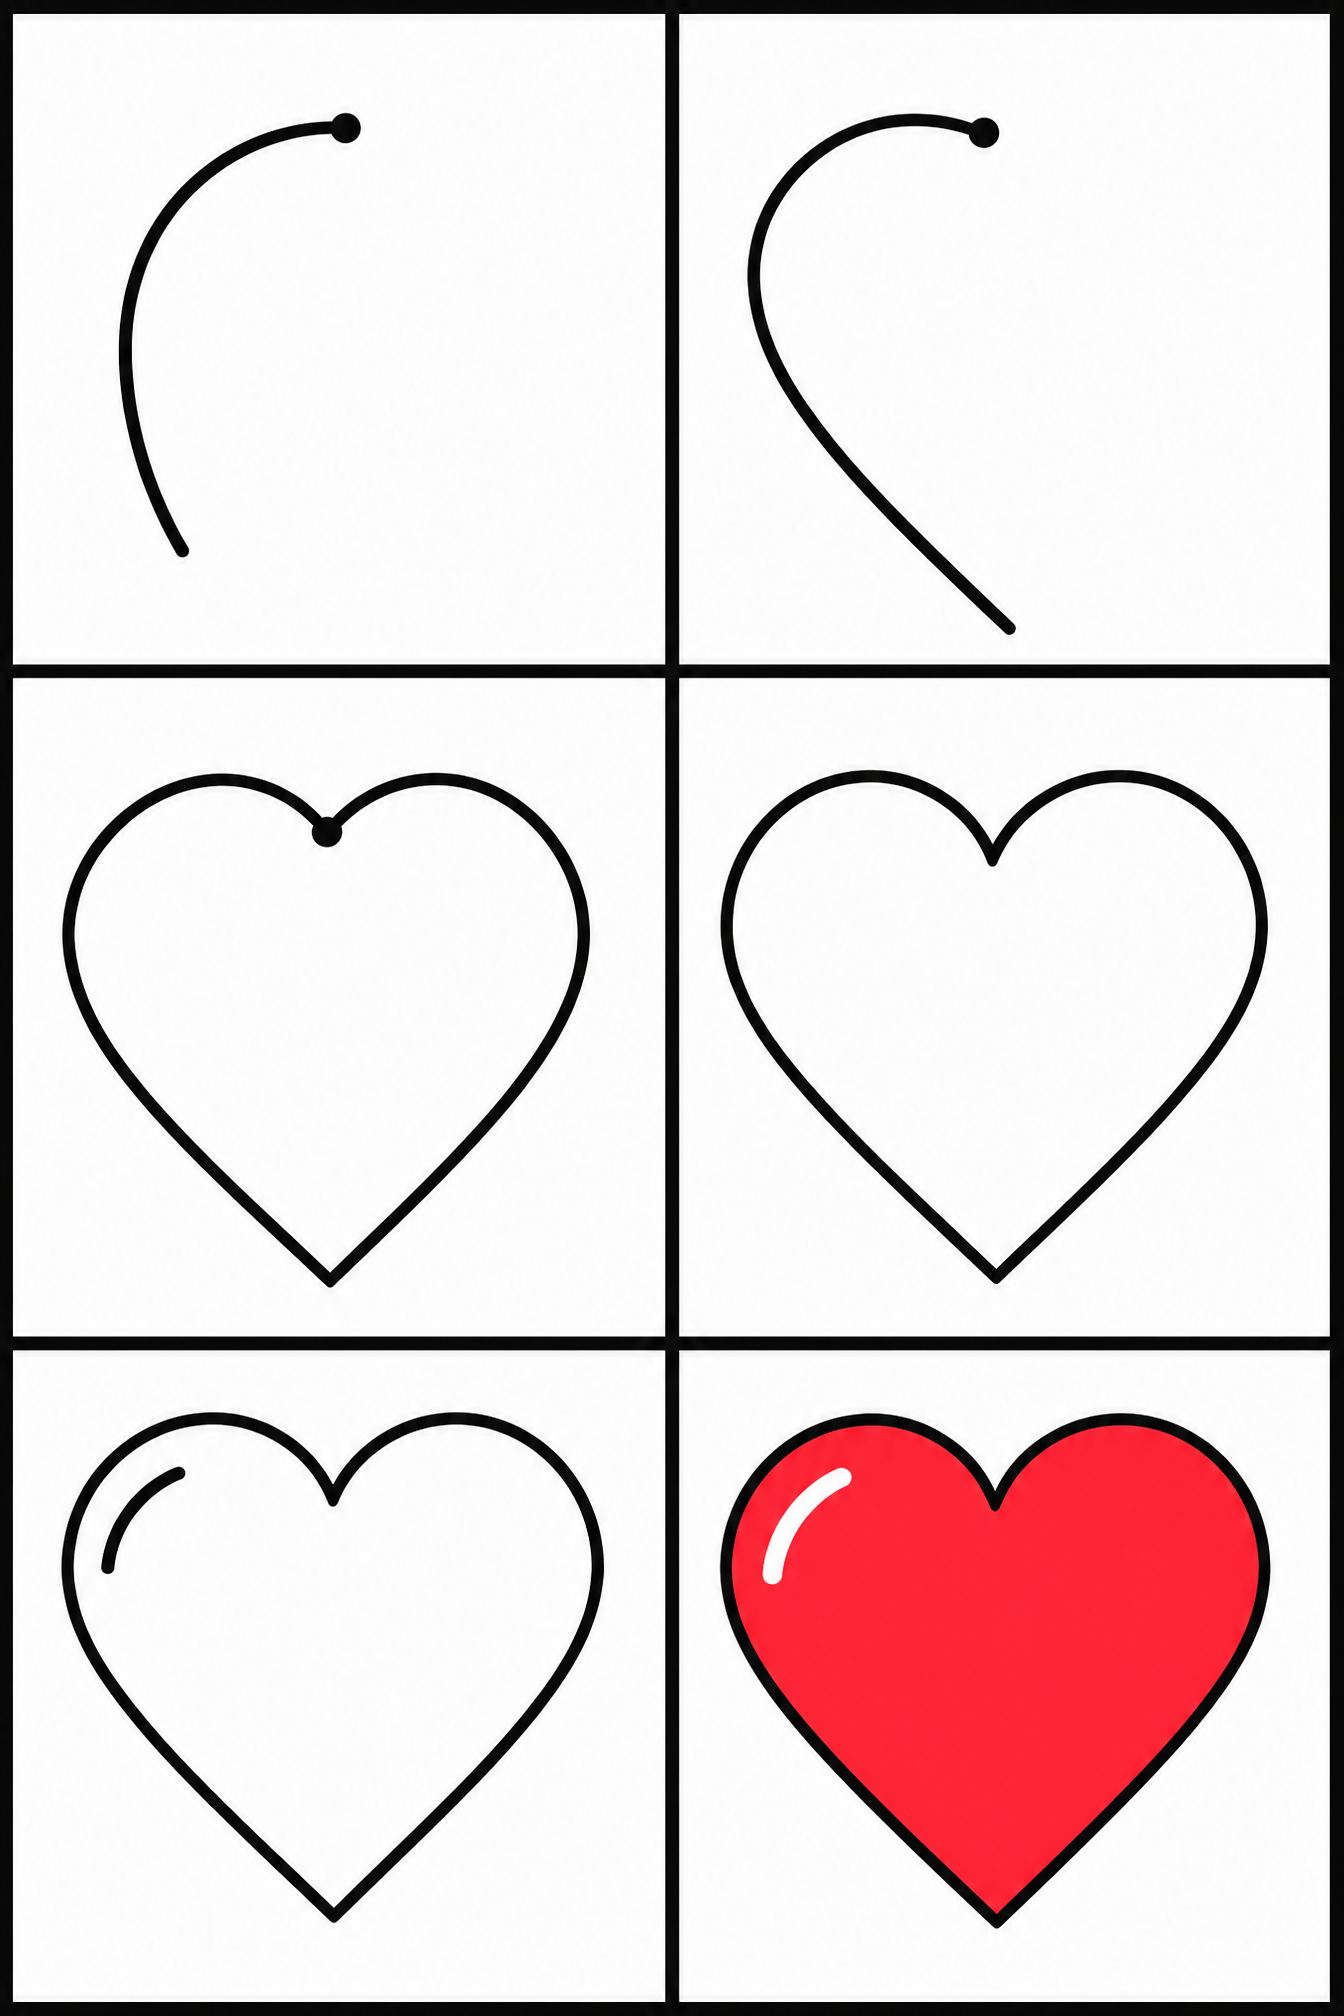
How to Draw Heart: All 6 Steps at a Glance
Here is the whole heart drawing, step by step, in one picture — save it or print it to follow along.
Frequently Asked Questions
General


Ready to Draw Heart?
Grab a pencil and follow the 6 easy steps — you can finish your heart drawing in minutes.